Discover how our future cooperation will look like and how your project will get a visual presence.
Step 1: Design brief
The very first step of our workflow. After contacting us, we send you a simple form in which you decide what kind of visualizations you want your project to include. We discuss the number and format of the final artworks, as well as deadlines and other technical details. We assist you to choose the best visual package you’ll need to grab your client’s attention.
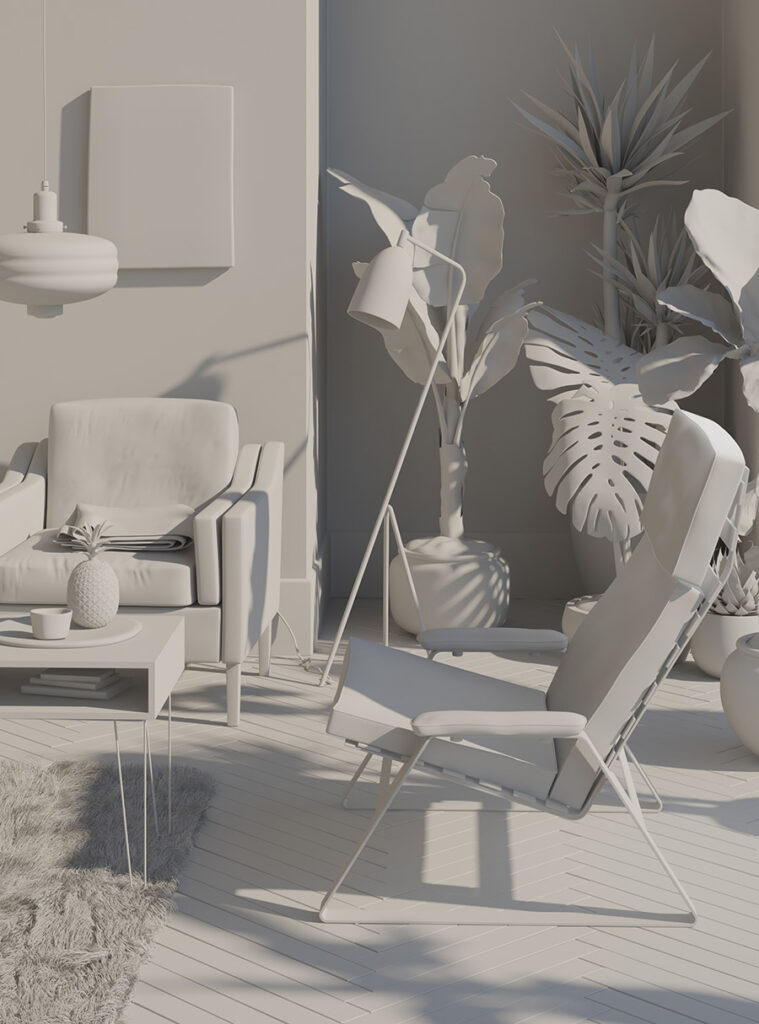
Step 2: Camera approval
When the design brief is made, we can get down to work. We create the “clay” model of your design and set up the camera positions for final 3D visualizations. Here is the moment when you can introduce your comments and changes to the model’s geometry, eventually approve it, and give a green light to the camera’s position.
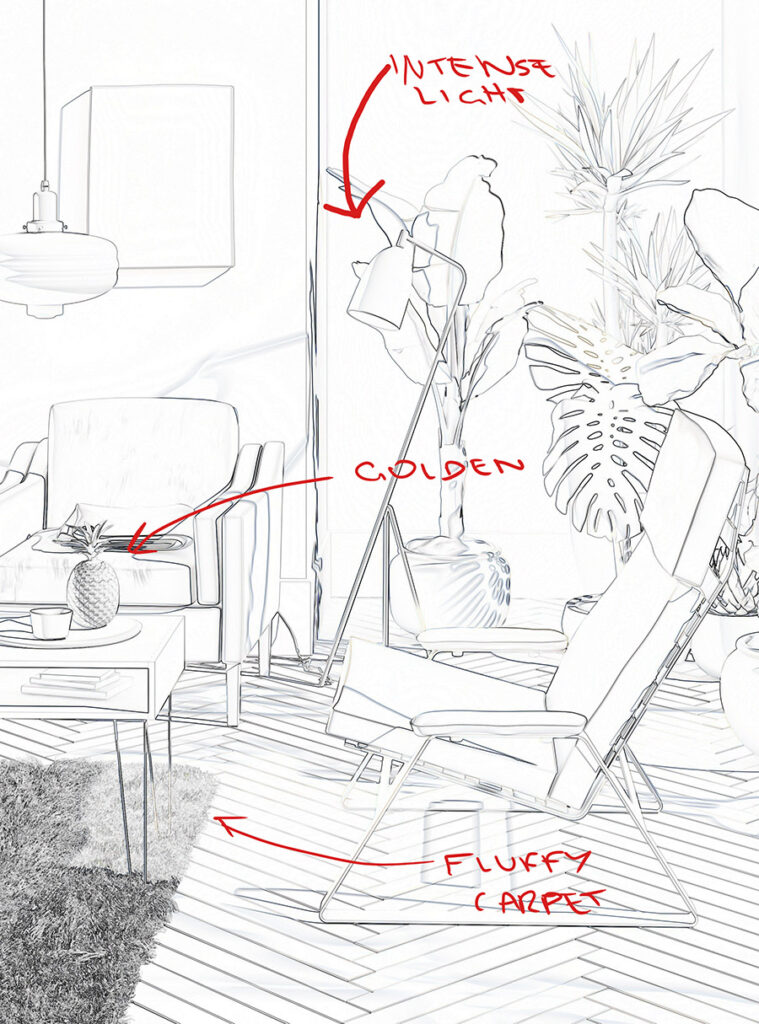
Step 3: Draft render
At this phase your design becomes alive. We assign your chosen colors and textures. Signs, symbols, and other visual elements should be accepted in this phase.
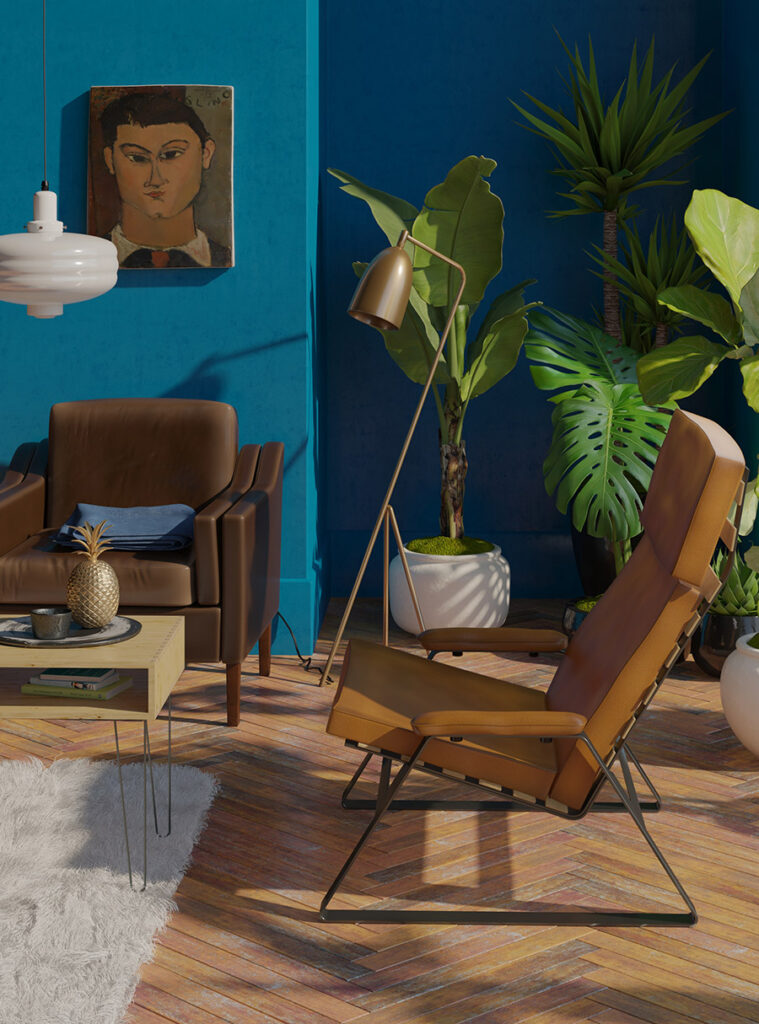
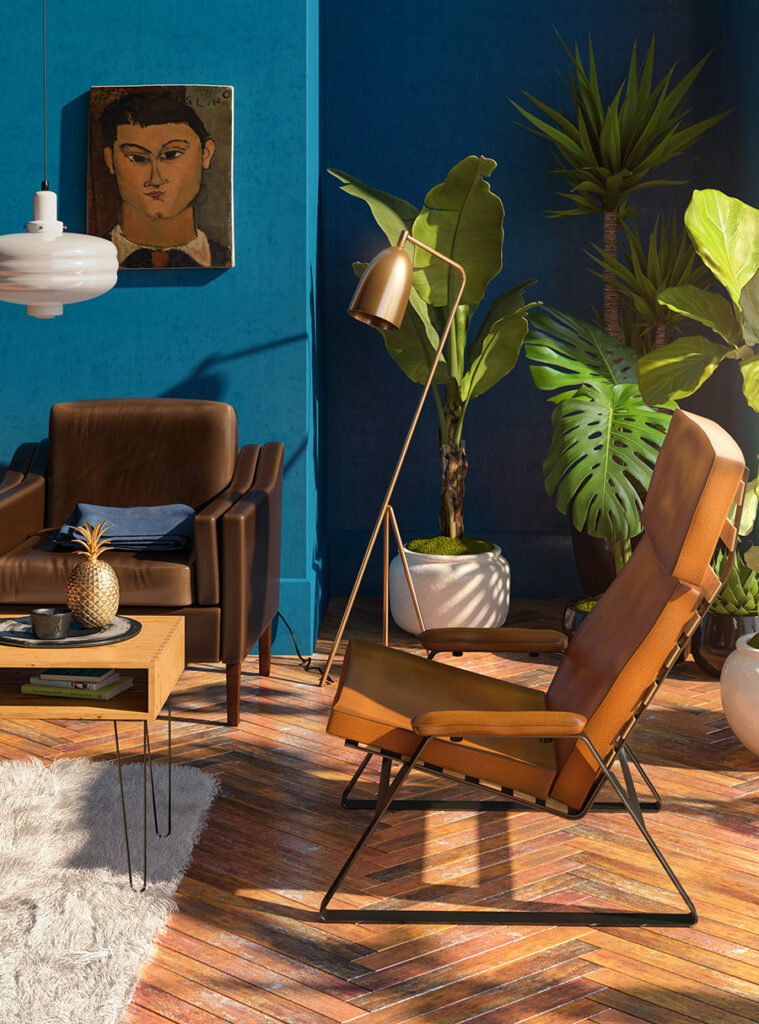
Step 4: Final render
We’re getting to the magnificent end of a task and play with the final twists. Adding light and some visual effects to the visualization will make your project stand out from the others.